Our Tiles Installation Guide

Silk Touch Ceramics tiles, manufactured using latest Italian Technology machinery are with best quality sands, which are purified by removing all impurities, So use proper and perfect way of installation to avoid bending, shade variation and sizing problems.

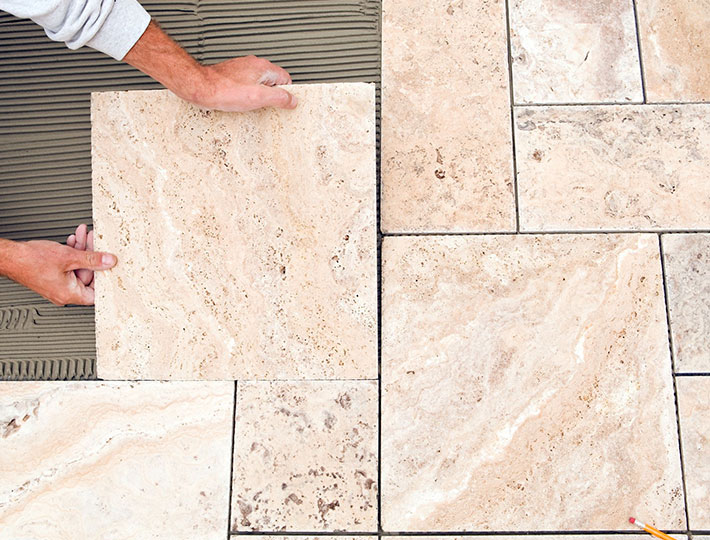
1. Prepare The Surface

Make sure the surfaces are clean and smooth. Vacuum up all of the crap off the flooring and remove any moldings, trim, or appliances that may interfere with tile application and check the doorjambs to make sure tile has clearance when installed beneath.

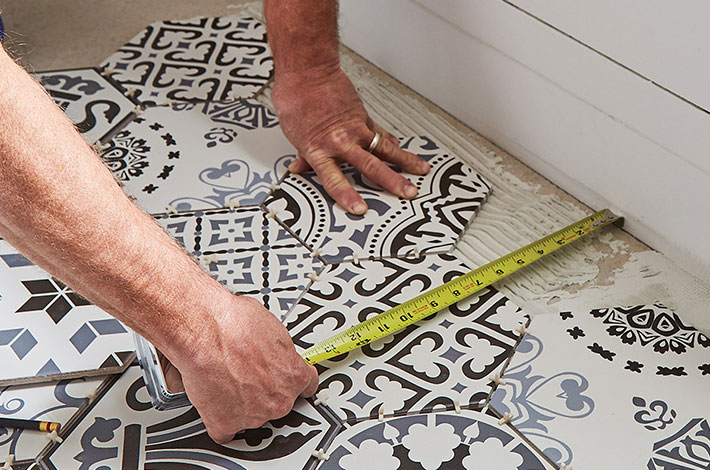
2. Soak Tile In Water And Then Dry It

Clean the back of the selected tiles and soak them in water for more than 2 hours. The purpose of soaking in water is to make ceramic tiles absorb enough water in advance, so as not to absorb the water in the bonding material after laying, affect the bonding strength or cause the bonding material to shrink excessively to cause hollowing, debonding, etc. After the ceramic tile is immersed in water, take it out from water and dry it before paving.

3. Set Up Auxiliary Line

Before the ceramic tile is laid on the floor, it is necessary to level the auxiliary line, determine the dimension line of the tile out of the wall by hanging the vertical line, and then set the horizontal line, so as to ensure that the tile is laid horizontally and the surface is flat.

4. Set Up Support Board

When laying the ceramic floor tiles, first set a horizontal line with a guide line, which can play a supporting role for the tiles and prevent the tiles from displacement or falling before reaching the adhesive strength.

5. Layout The Floor Tiles

Gently press the tile into the wet thinset, twisting the tile back and forth to press it deeper into the thinset. Your aim is to collapse any ridges in the mortar and fill in gaps. Occasionally lift a tile and check the back to ensure full coverage. As you progress from one tile to the next, place tile spacers at the corners to maintain consistent spacing. Lay the bubble level across multiple tiles to check for both level and to eliminate lippage from one tile to the next. Lightly tap the tiles with the rubber mallet to level them.

6. Grouting Tiles

After the completion of ceramic floor tiles installation, grout or fill the joints to avoid the gap leakage into the dust, which is difficult to clean, and also increases the aesthetic degree of the tiles. When grout tiles, check the straightness of the seam grid after two or three lines. If it exceeds the requirements, trim it immediately, straighten the seam and hammer it with a rubber hammer.

GVT Collection

Medium Format Tiles

Perfectly flat and extremely light, the 600 x 600 mm GVT/PGVT Tiles, an authentic architectural skin designed as a covering material for glossy,rustic (floors) with surfaces that boast excellent performance, ranging from soft, natural textures to industrial, ultra-technological options.

Swell Granito's 600 x 1200 mm GVT/PGVT Tiles, are the fruit of the innovative production line activated recently. They offer priceless millimetres of extra space for the hands of skilled workers, providing them with more creative freedom than ever before.

PGVT Collection

Large Format Tiles

Perfectly flat and extremely light, the 600 x 600 mm GVT/PGVT Tiles, an authentic architectural skin designed as a covering material for glossy,rustic (floors) with surfaces that boast excellent performance, ranging from soft, natural textures to industrial, ultra-technological options.

Swell Granito's 600 x 1200 mm GVT/PGVT Tiles, are the fruit of the innovative production line activated recently. They offer priceless millimetres of extra space for the hands of skilled workers, providing them with more creative freedom than ever before.

Whatsapp Chatx

Hi! Click one of our representatives below to chat on WhatsApp or send us email to export@royaletouchevitrified.in , info@silktouchceramics.com

Domestic
+91 89800 00273